Making Wrecked Star Wars™ Vehicles
02/04/2025
When Atomic Mass Games commissioned me to make a scrapyard-themed battlefield for the Star Wars™: Shatterpoint miniatures game, they sent a ton of plastic kits my way to bring the thematic setting to life. In this series of tutorials, I will give you a look at my building process and show you how I customized the various terrain sets and vehicles to create some evocative scenery elements. The different tutorials will focus on:
- Kitbashing Star Wars Buildings
- Making Wrecked Star Wars Vehicles
- Adding Scrapyard Rubble to Your Scenery
In this installment, I will show you how I made the large piles of vehicle wreckage for the scrapyard. The wrecks I made have been piled with scrap, but these techniques are also useful for making simple “crashed” vehicles.
This is a basic list of tools and supplies that I used for the project:
- Super glue (aka: cyanoacrylate glue)
- Hobby knife
- Clippers
- Hot glue gun
- Wood burning tool
- Foam core board
- Insulation foam panel scraps
- Small putty knife
- Construction adhesive
- Waterproof wood glue
- Thin super glue (cyanoacrylate)
- Isopropyl alcohol in a spray bottle
- Fine sand and gravel
- Plenty of “scrap” (styrene off-cuts, spare model parts, and found objects)
- And, of course, some Star Wars: Legion vehicles to wreck
Building the Wrecks
Any vehicle can be turned into an interesting terrain element by “wrecking” it. If you are building a scrapyard, you will want to combine a few vehicles to make large piles of salvaged wreckage. You could also use a single vehicle to make a crashed ship which can serve as a centerpiece for your battlefield or as the focal point in a scenario involving the recovery of its pilot or a piece of precious cargo.
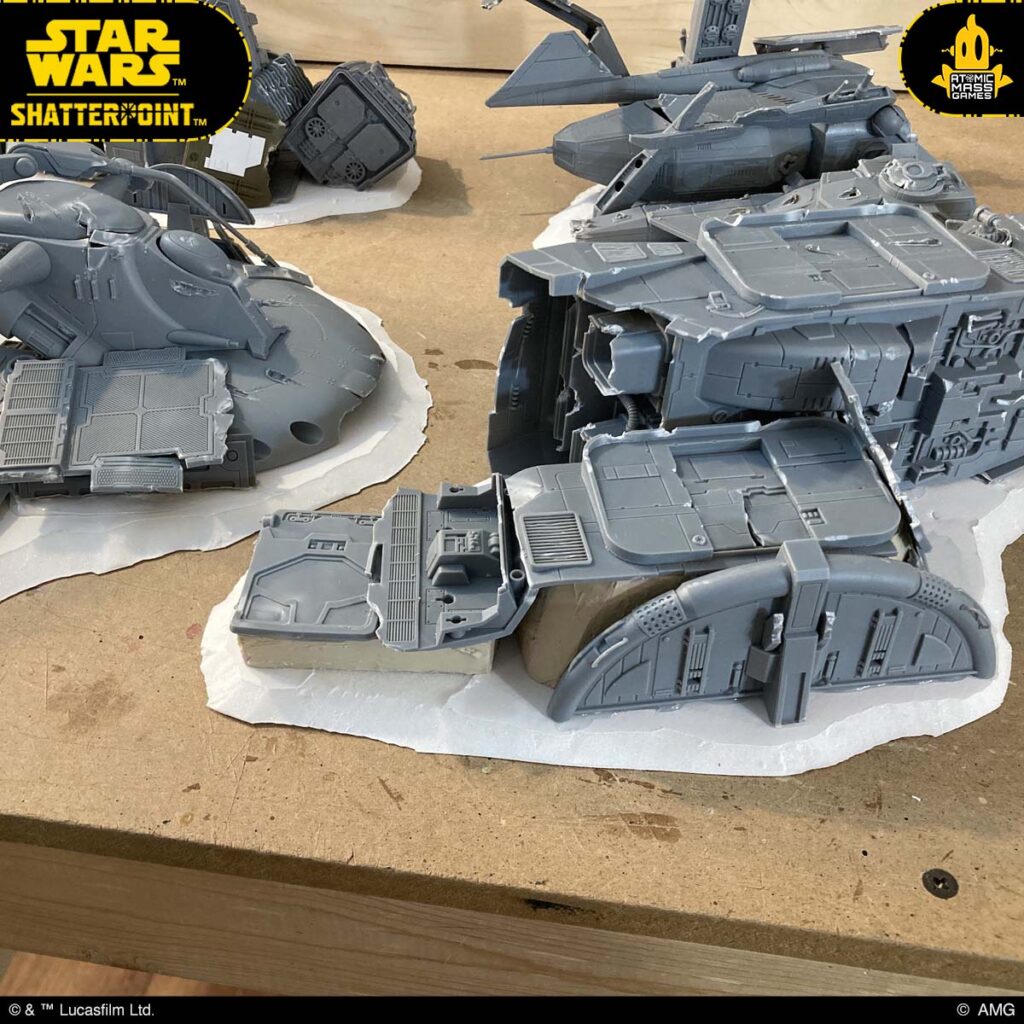
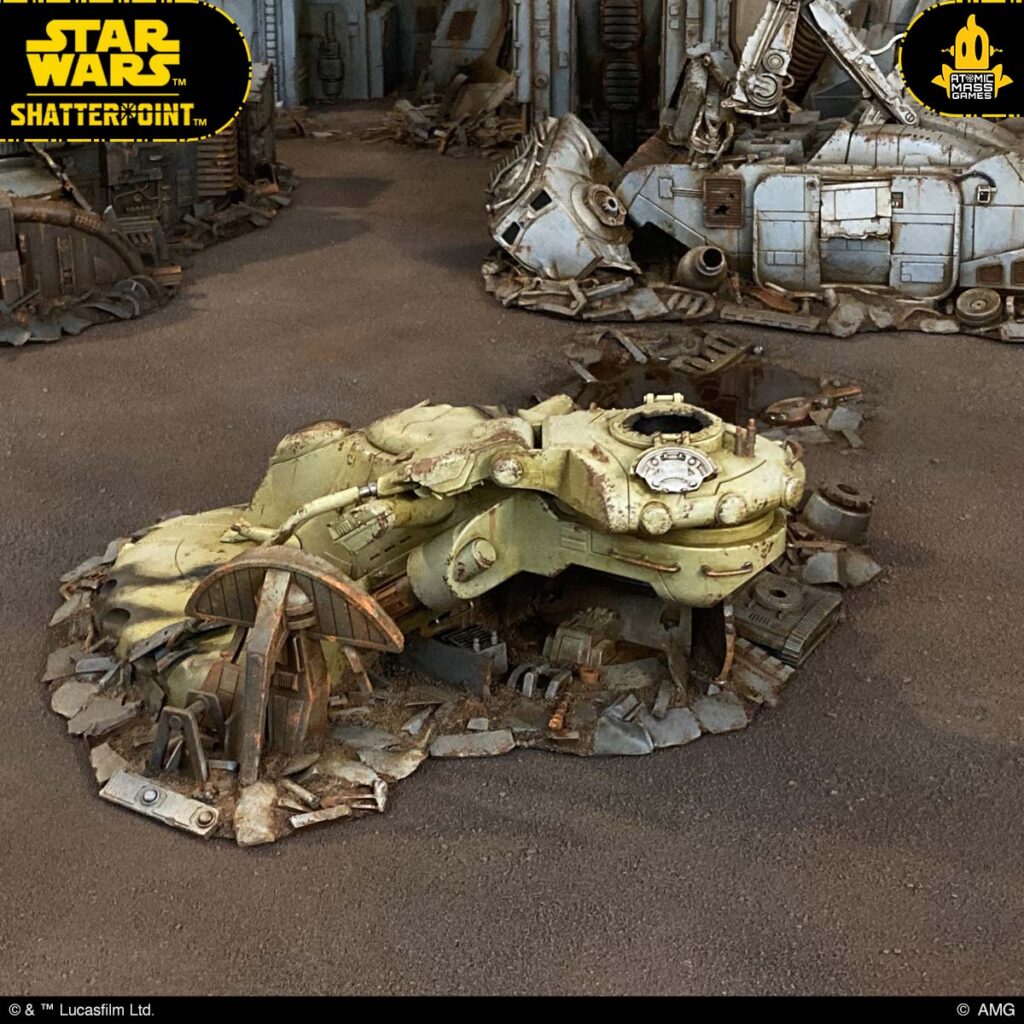
Of the vehicles I had to work with, the A-A5 speeder truck was the most versatile. If you are buying a vehicle to wreck or to kitbash with, I’d recommend this one. It has a fully detailed interior, and all of the interior parts are separate from the exterior. Even if you build it to use as the A-A5 speeder truck in the game, you can build it “closed” and still have all the internal panels left over to use for kitbashing other terrain projects. (You just need to spray the inside of the clear canopy black so you can’t see inside.) In addition, because the speeder has a very “boxy” shape, you can make a wreck that is easy for miniatures to stand on.
In this image, I have cut away most of the speeder’s roof and built its interior. The edges of the opening were distressed with a hobby knife and clippers and bent to look like twisted metal. I added some lengths of styrene rod and tube to represent the exposed superstructure frame of the vehicle. I also trimmed the back of the speeder so it could stick out of the ground at an angle. The engines, the removed section of roof, the interior ceiling, and even the doors were saved for use elsewhere in the scrapyard.
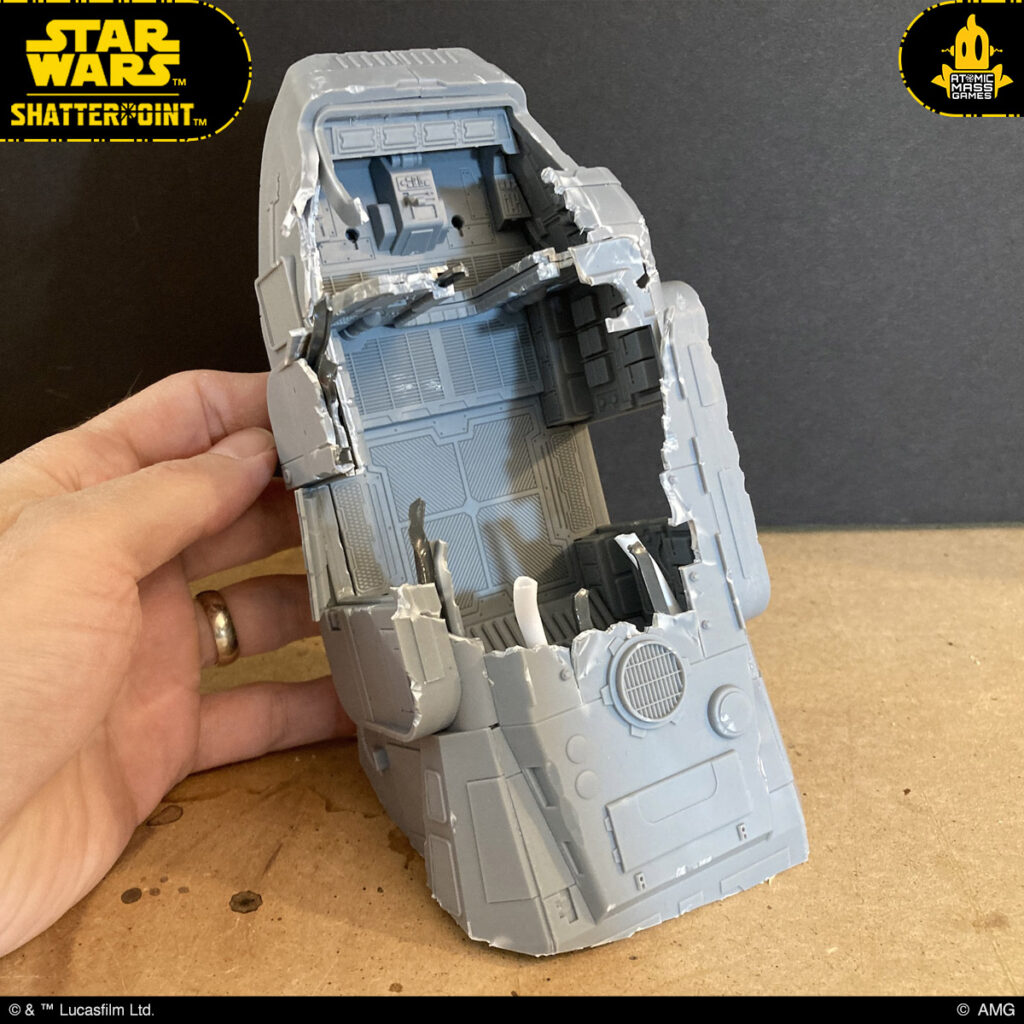
Another feature of the A-A5 speeder truck is that whichever side of the speeder will be face down can be left off and used for extra parts. I planned to position this speeder upside down, so I have left the top off and left out all of the interior components.
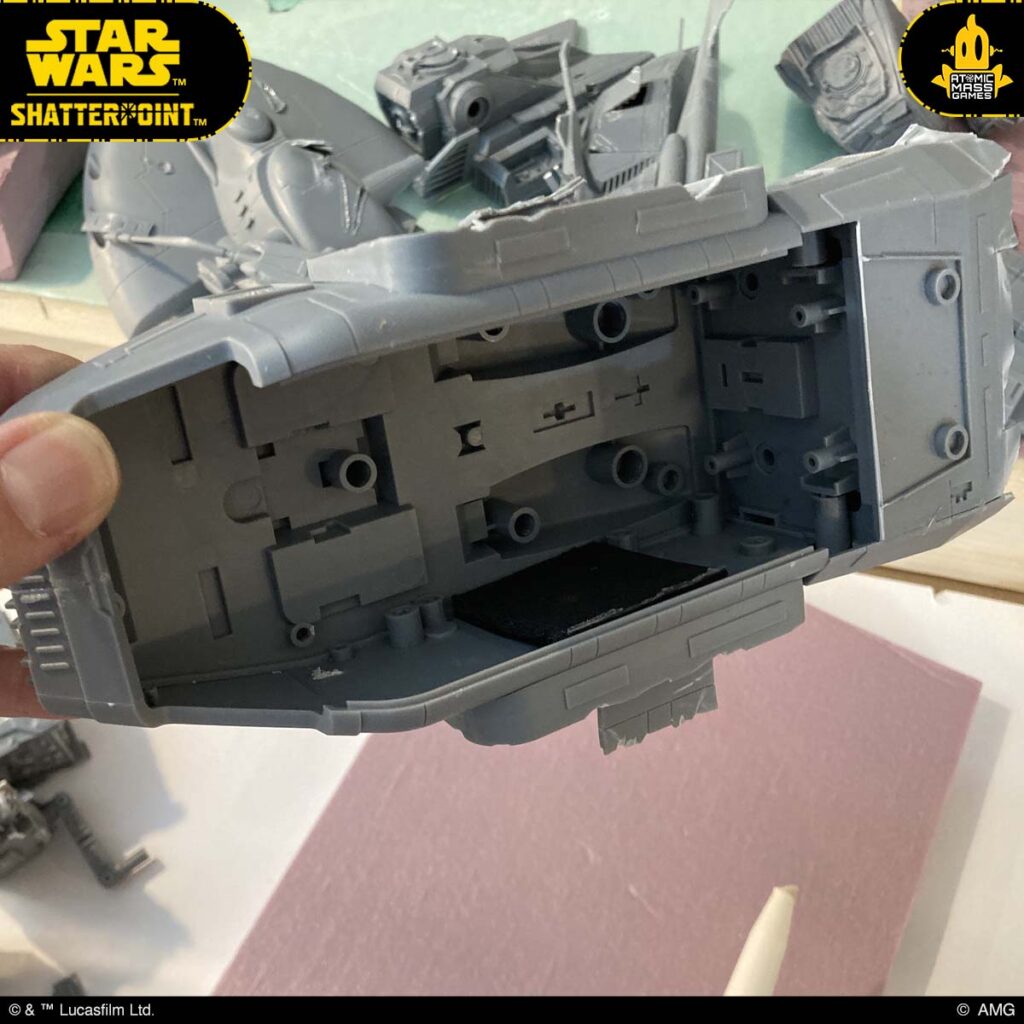
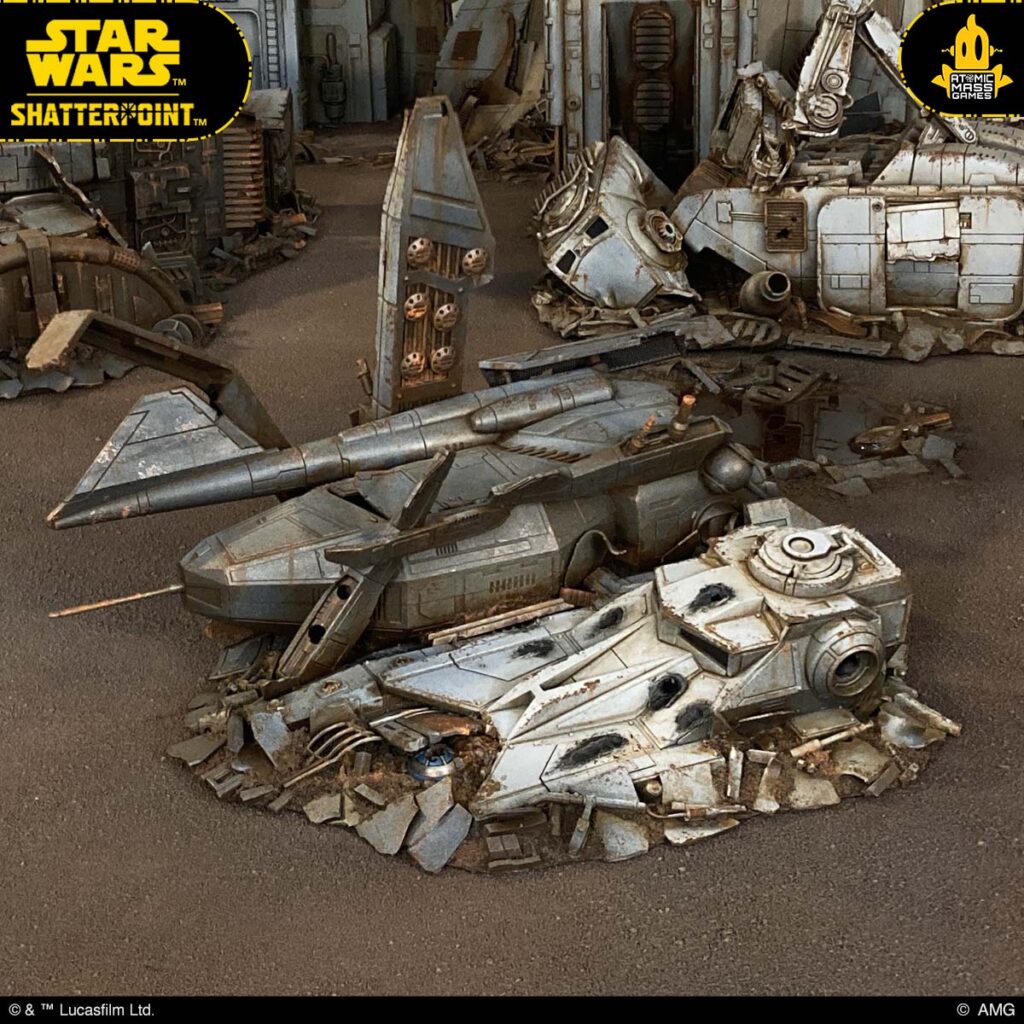
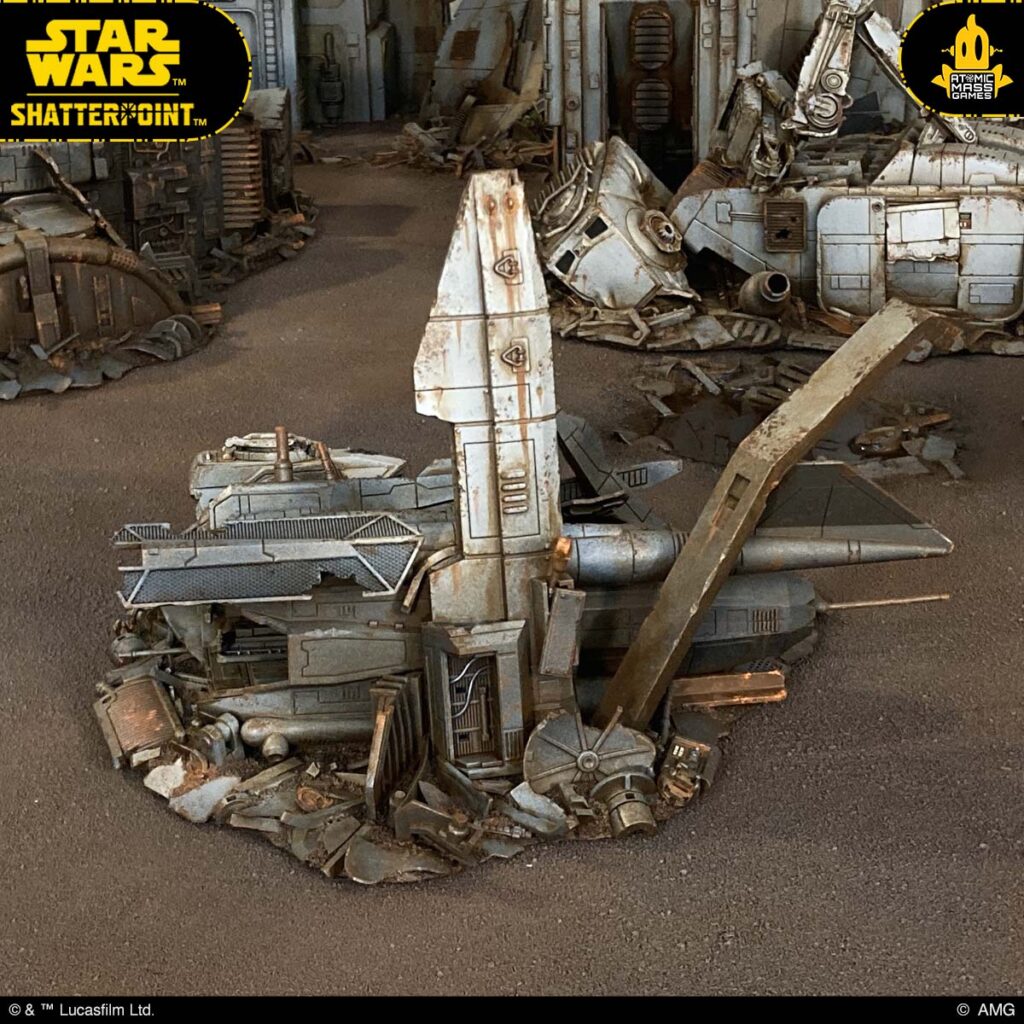
This principle holds true for most of the vehicles. Here you can see that the bottom panel of the TX-130 fighter tank has been kept separate, for use as scrap in another terrain piece.
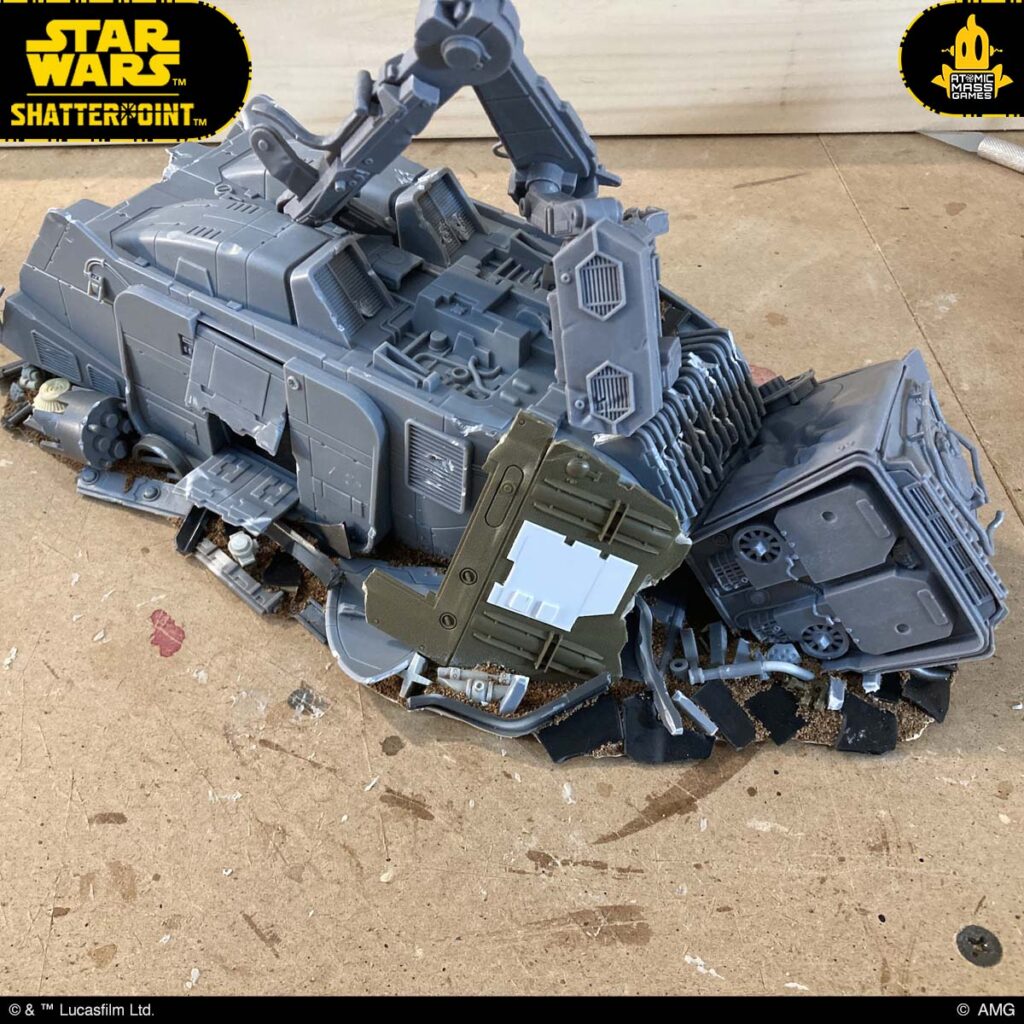
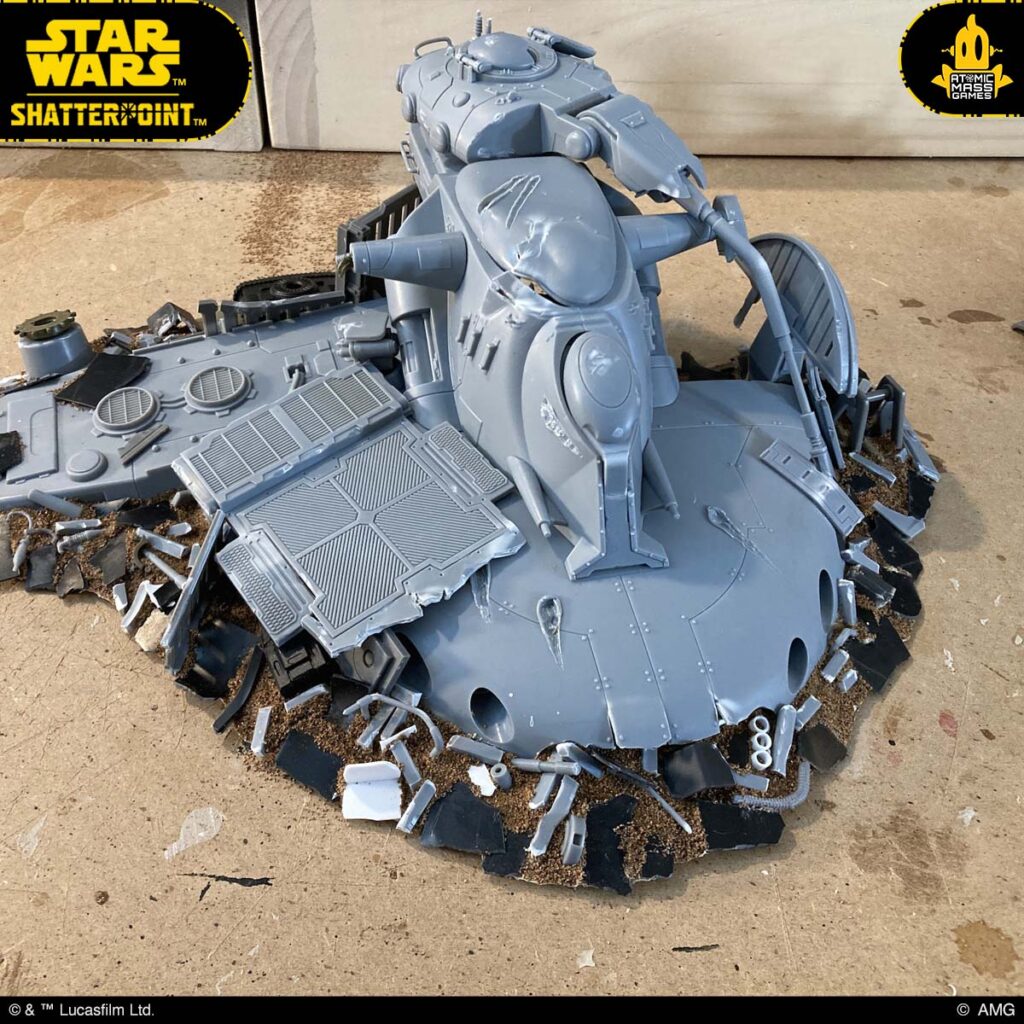
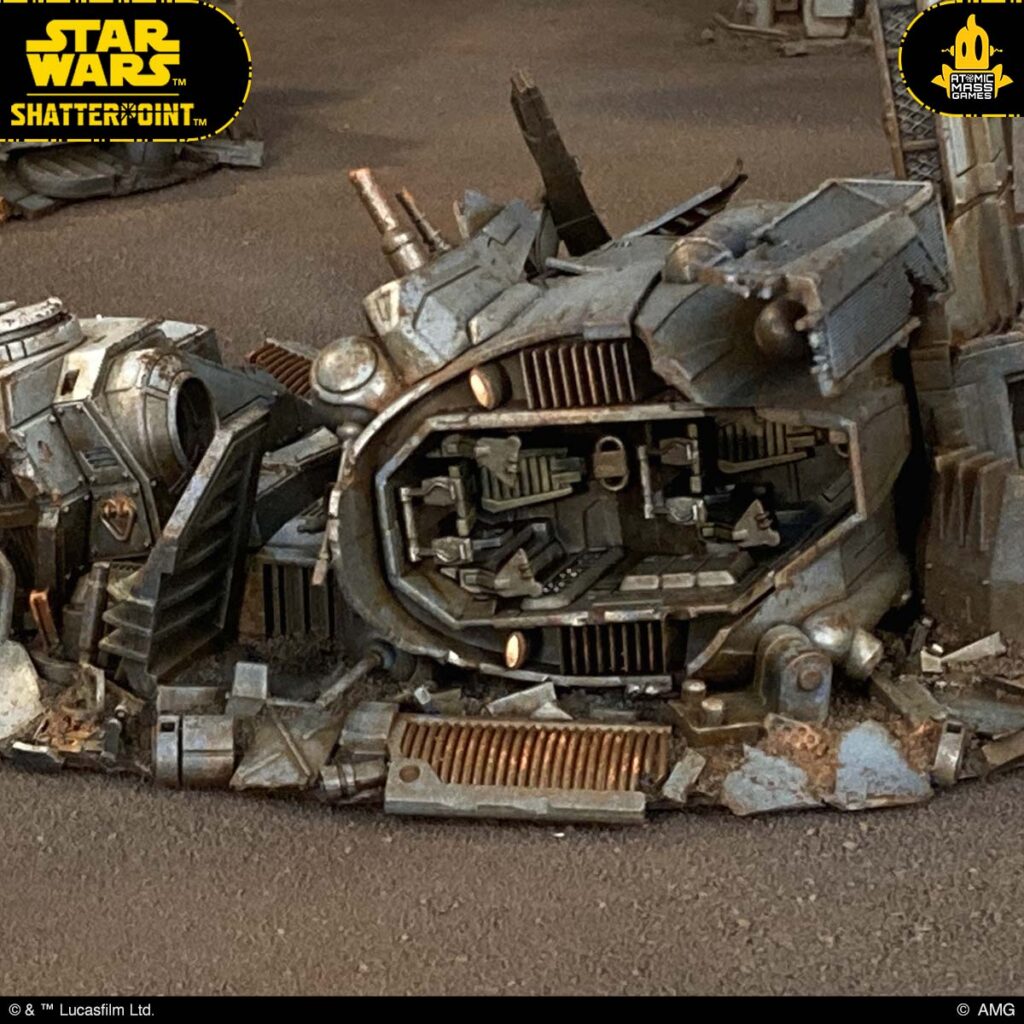
Otherwise, the vehicles were all assembled as normal. I bent some of the components, like the cannon barrel and fins, and distressed the edges with a hobby knife and clippers. On the Trade Federation battle tank, you can see where I burned the surface with a wood-burning tool. By dragging it across the surface and then pressing gently, I was able to create some convincing blast marks. I even burned a few straight lines to represent lightsaber cuts. If you do this on your own vehicle wrecks, make sure to do it outside and use a respirator to avoid breathing the fumes from the burning plastic.
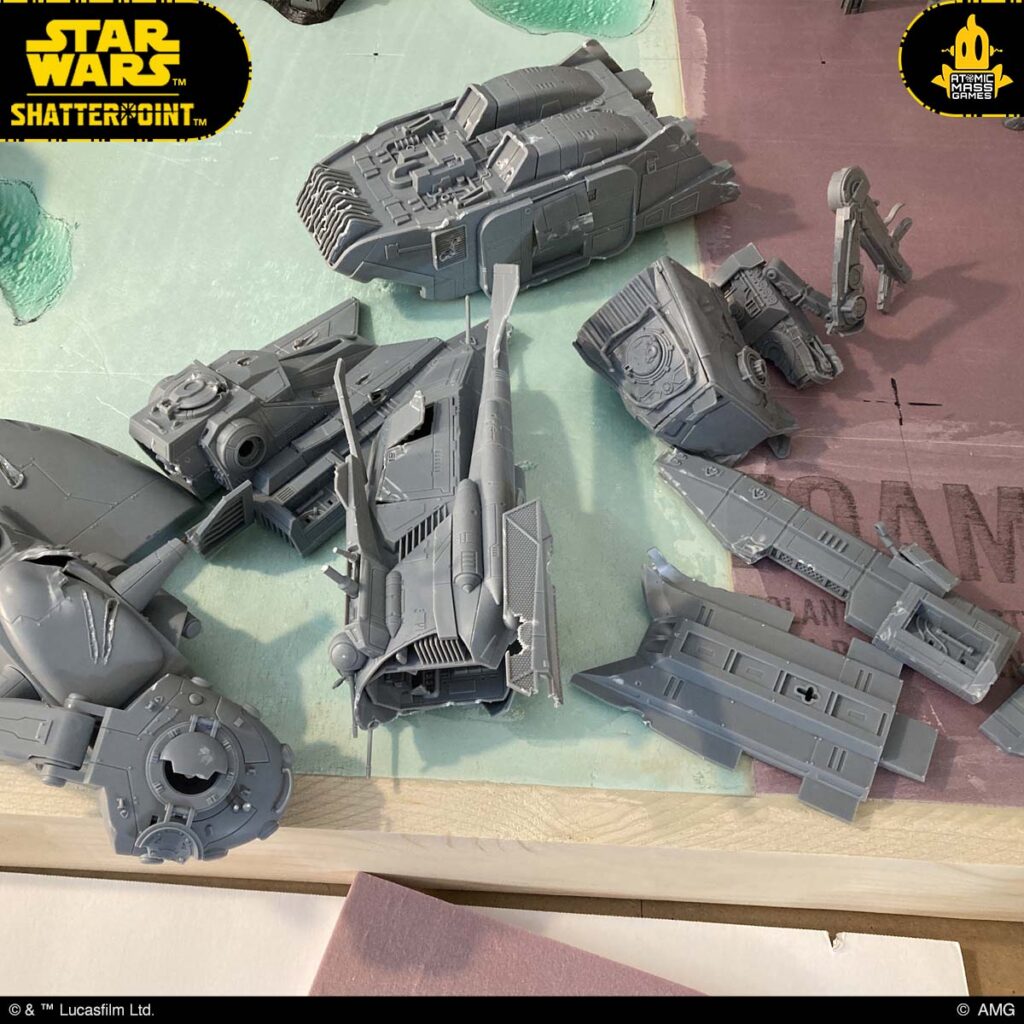
With the wrecks assembled, it was time to plan out the scrap piles. I laid out the components on a sheet of foam core board and marked their positions. I also had a few scraps of insulation foam that I used to prop up the pieces to create steps that miniatures could use to traverse areas of the terrain.

I had enough parts to create four piles of vehicle wreckage. When using the foam to create the steps, I first coated it with construction adhesive and let it dry. The adhesive protected the foam so I could super glue parts directly onto it and ensured that any exposed areas would not melt when spray priming the piece. All the vehicles were attached to the foam core base with a hot glue gun. The foam core base was then cut around the vehicle parts and its edge was beveled with a knife.
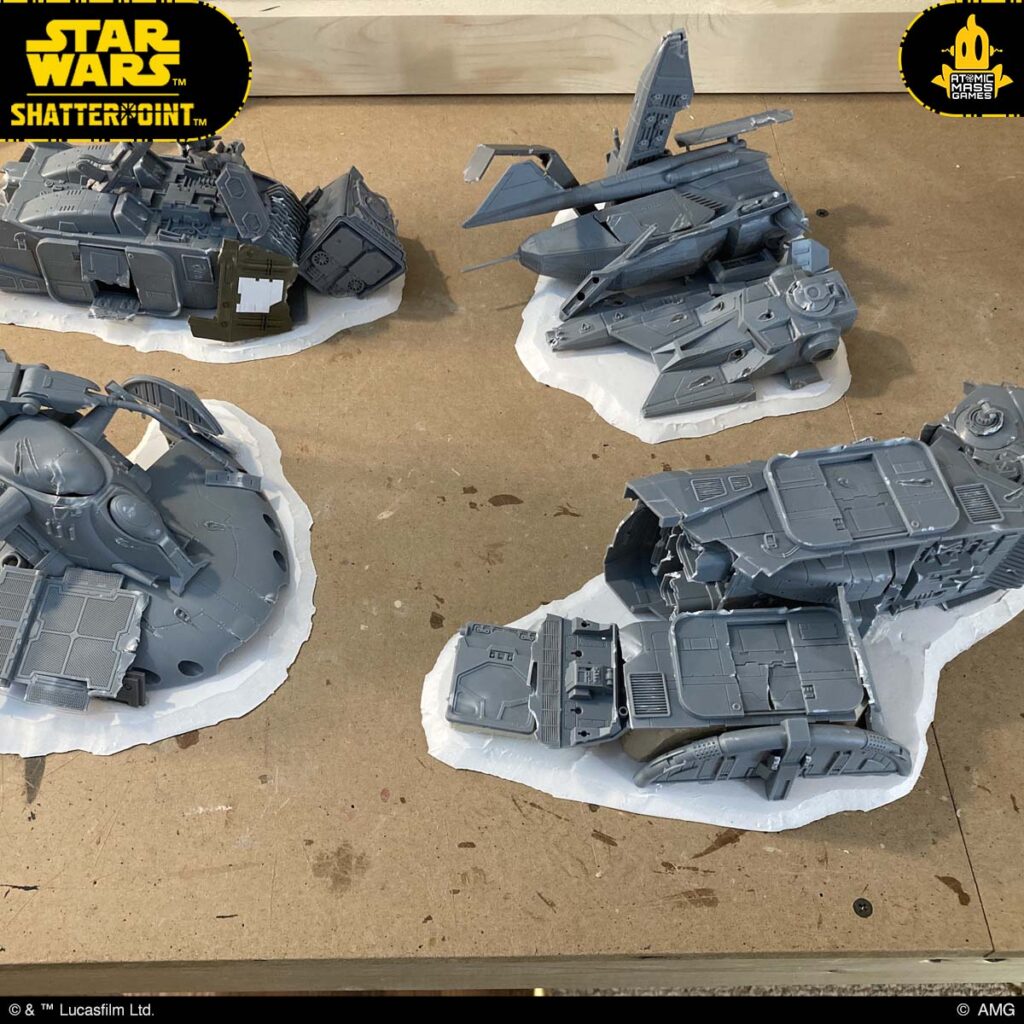
You can see how the flat vehicle sections were used to create stepped levels that miniatures would be able to stand on.
From there, it was just a matter of adding scrap around the bases. This process followed the same techniques used in the Adding Scrapyard Rubble to Your Scenery tutorial. When adding the extra scrap, I also made sure to cover any exposed insulation foam that I used to prop up the vehicle parts and conceal any recesses where unfinished interiors might be visible.
If you are making a crashed vehicle, rather than adding scrap you could model the base to match your battlefield.
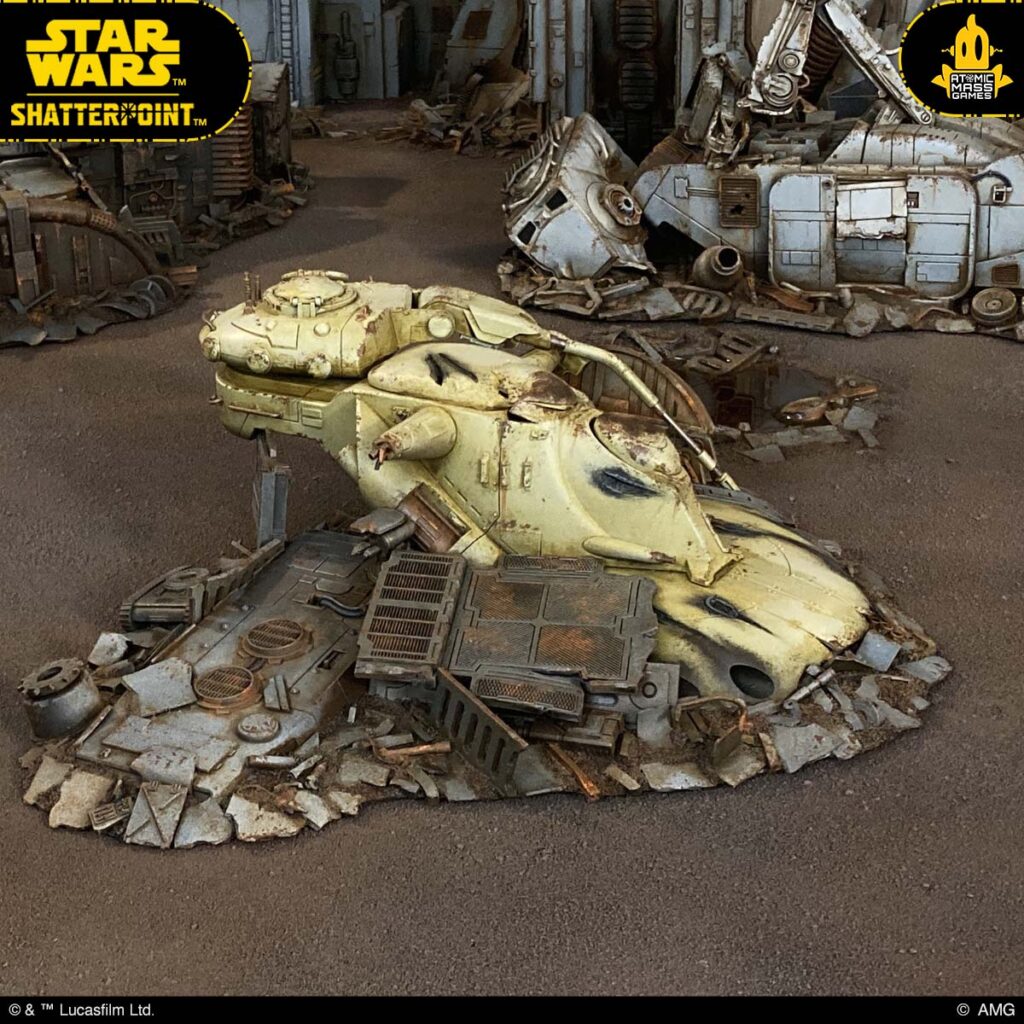
When it comes to painting the wrecks, paint them as you normally would, but be sure to add more rust, dirt, and weathering depending on how old the wreck is supposed to be. For example, an older wreck might be completely filthy and rusted out, while a recent crash would be pretty clean except around the damaged areas.
I painted these vehicles with mostly sprays: dark and light greys for the majority of it, and a mustard-yellow spray for the Trade Federation battle tank. Then I washed them with rusty browns and oranges, sponged on some paint chips, and added rust streaks. The blast marks were drybrushed with black and grey, and the scrap was painted to match the rest of the scrapyard and blend into the surrounding terrain.

This project was a blast to work on, and I’m glad I had the opportunity to share some of my process with you. I hope these tutorials have inspired you to try out some new techniques and add some variety to your own battlefields!
Thanks for joining us on this installment of this series from Rob Hawkins! We hope that you gained some ideas and inspiration to start or continue building your Star Wars: Shatterpoint terrain. Visit your friendly local game store or the webstore today.
Until next time, Atomic Mass Games, signing off!