STAR WARS: Legion Crashed Vehicle Project Part 2
07/21/2023With the inclusion of a crashed vehicle scenario in Star Wars™: Legion Spec Ops, our team decided to take on the challenge of crashing vehicles from our armies so that we could use them as terrain for content and home games. Here’s the rundown on their goals:
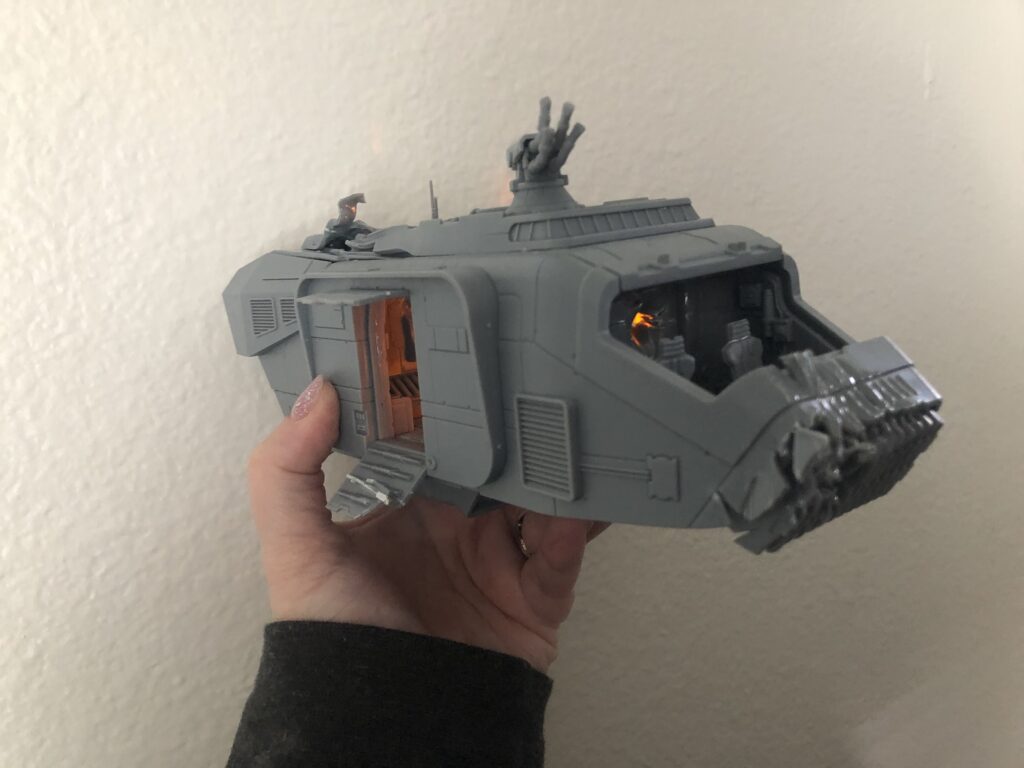
- Dallas Kemp will be creating a crashed LAAT inspired by a downed helicopter for the Grand Army of the Republic.
- Anne Richmond will be creating a crashed A-A5 Truck for the Rebel Alliance inspired by Sabine Wren’s art.
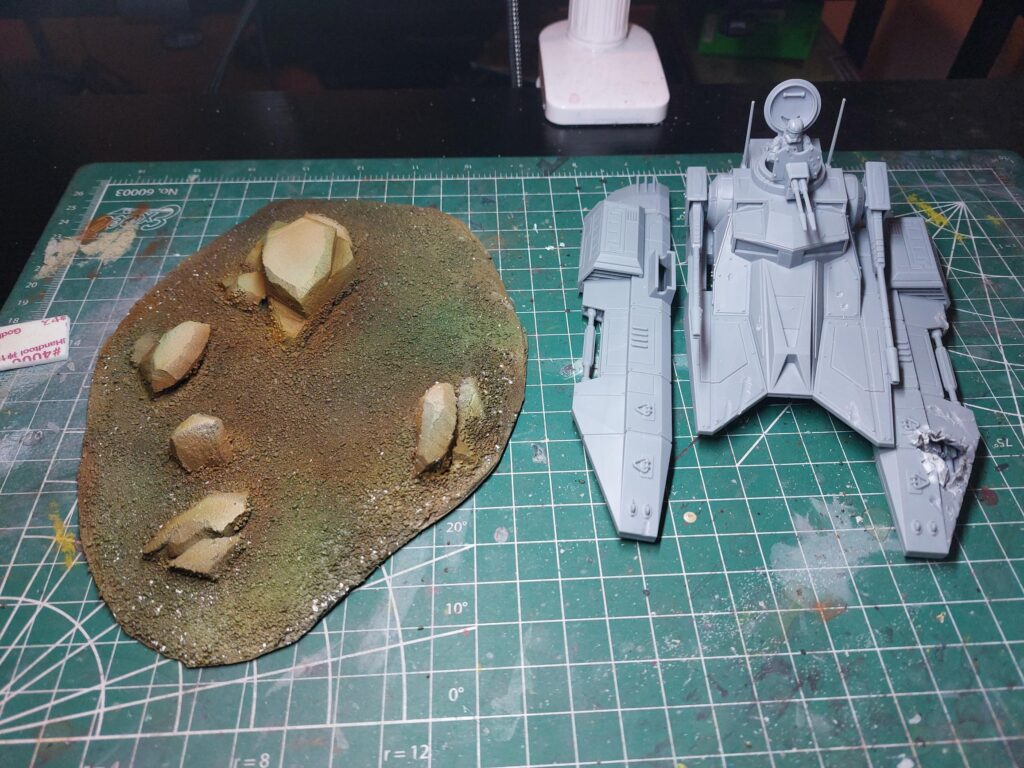
- Kevin Kircus will crash an immobilized TX-130 for the Grand Army of the Republic.
- Justus Morschauser will crash a AAT in a way that still allows it to be playable in other games for the Separatists.
Has your plan for your vehicle changed as you began work on it? If so, how and why?
Dallas: So far, the plan has stayed intact…that’s a first!
Anne: One thing that really stood out for me during assembly is that the sculpted interior of the truck. I decided it needed its day in the sun, so I added an LED inside the cab and kept both doors partially or fully open – as if whoever was inside would have done their best to escape after they rolled to a stop.
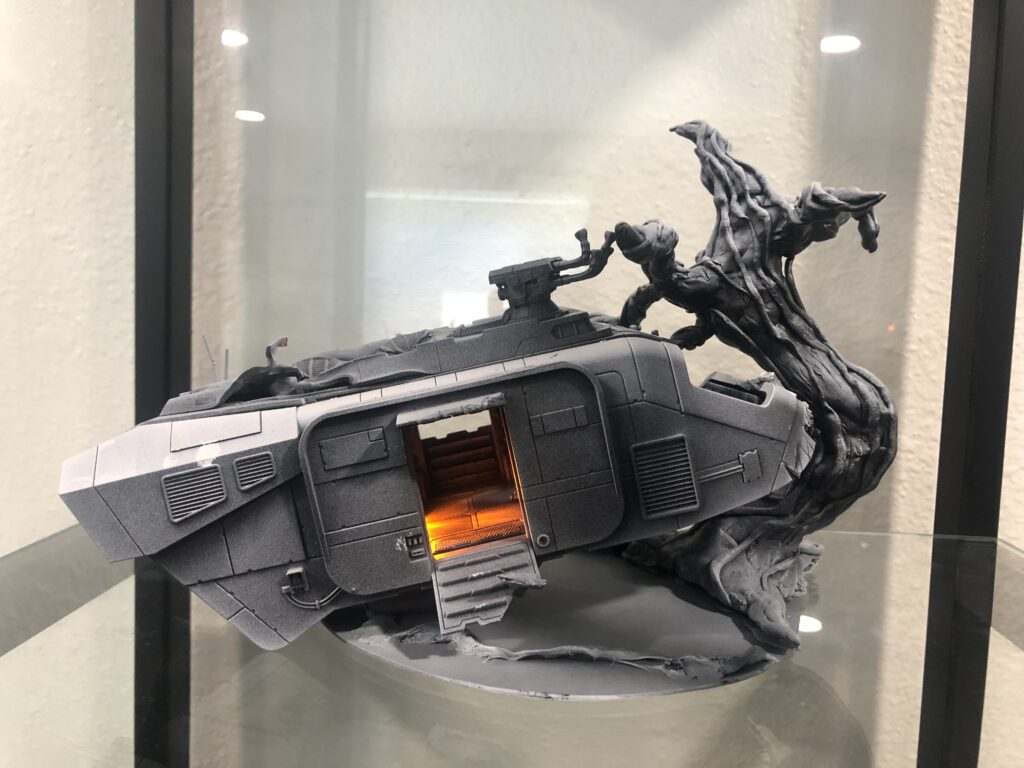
I also started to think about how the truck was driven into the tree. Perhaps an engine got knocked out by a thermal detonator barrage. So I melted one of the back propulsion vents, imagining that this would have caused the other one to suddenly turn the truck in the direction of the tree before the pilot could recover.
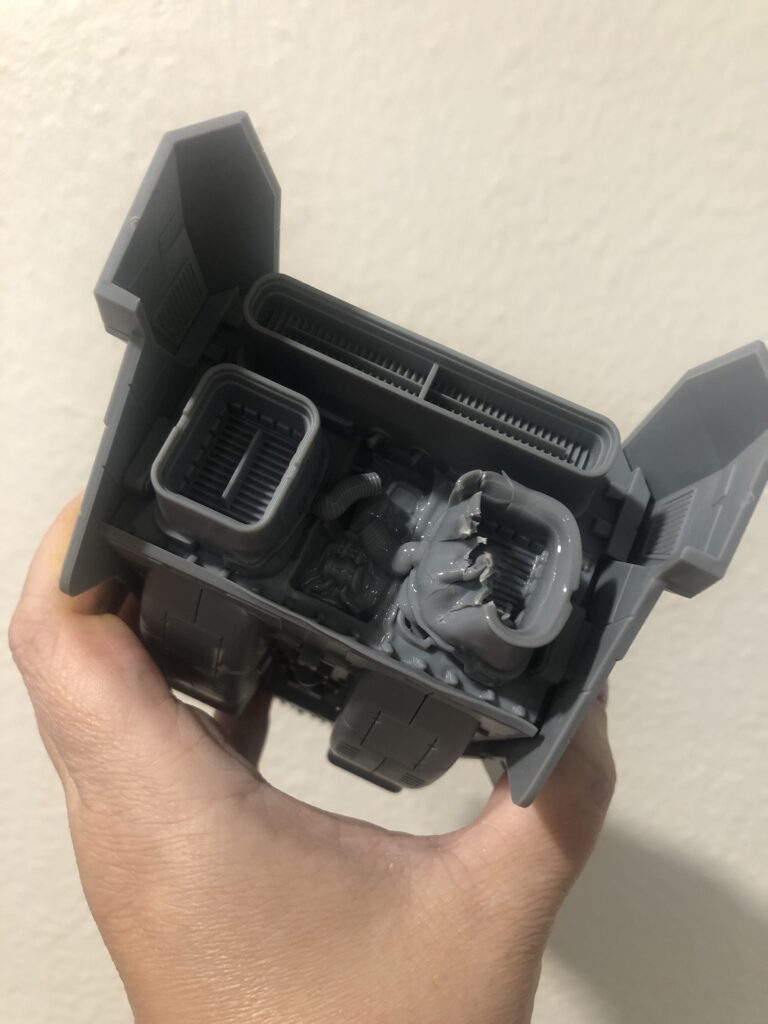
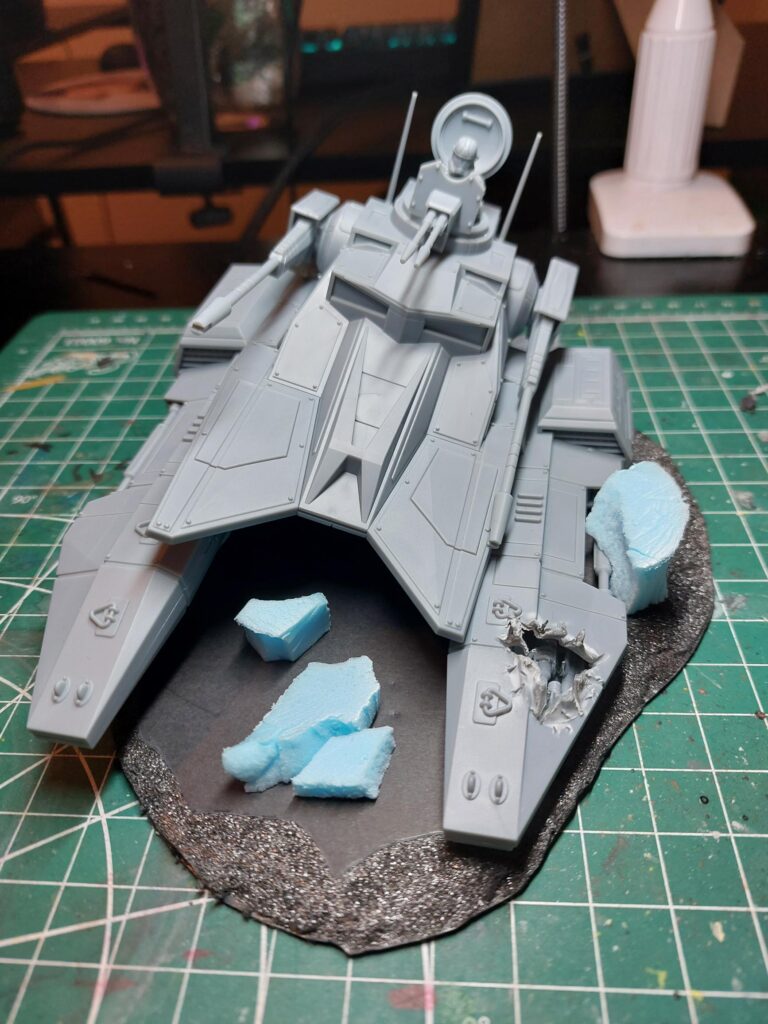
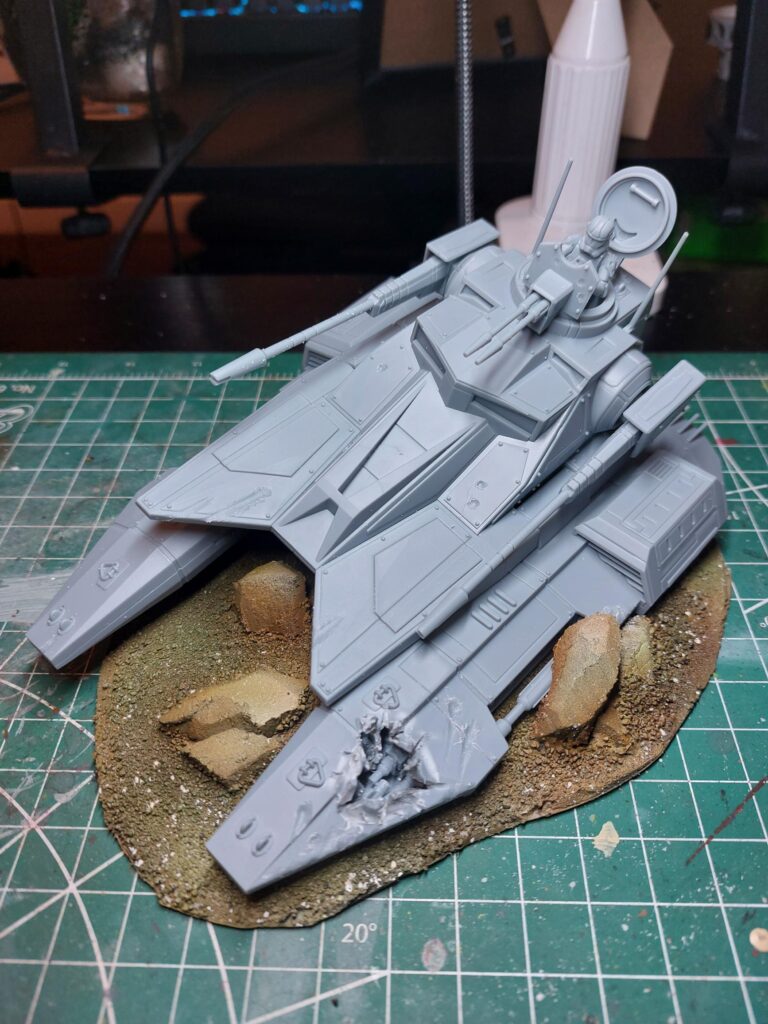
Kevin: My plan did end up changing slightly from conception. I realized about three quarters of the way through the build that when I sat the tank on a normal gaming base it looked like a battle damaged, but still plausibly functional tank. Much to Dallas’ chagrin, this lead to me building keys into my wreckage base that I can use to swap the tank between being a cool piece of terrain and a functional game piece.
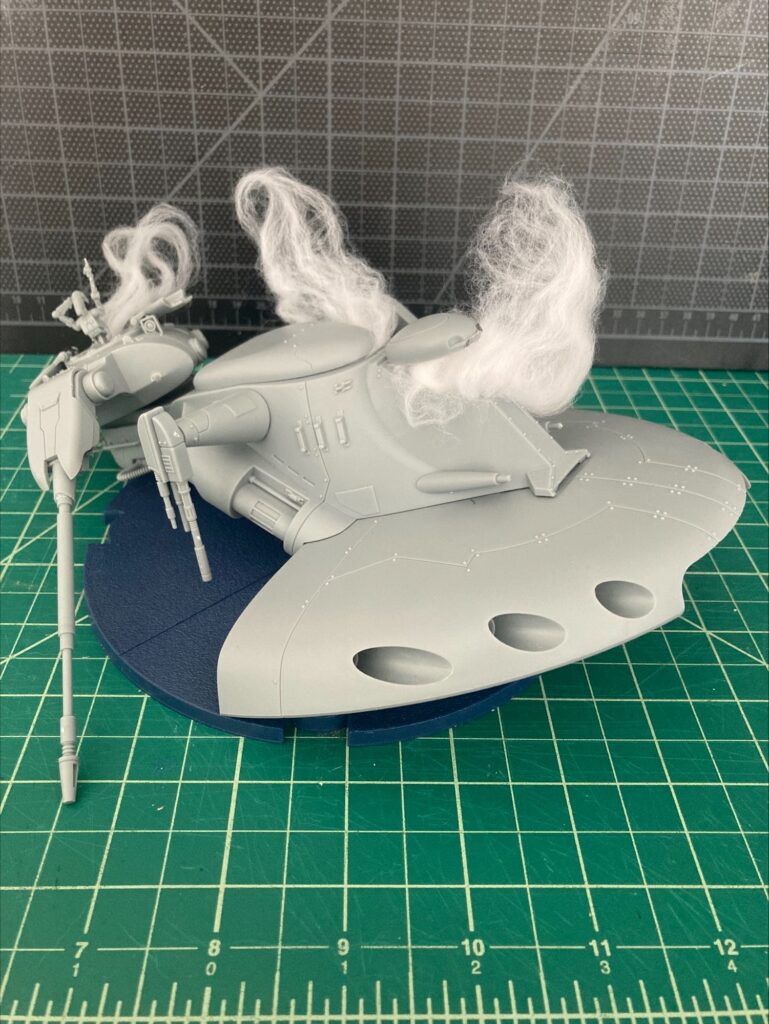
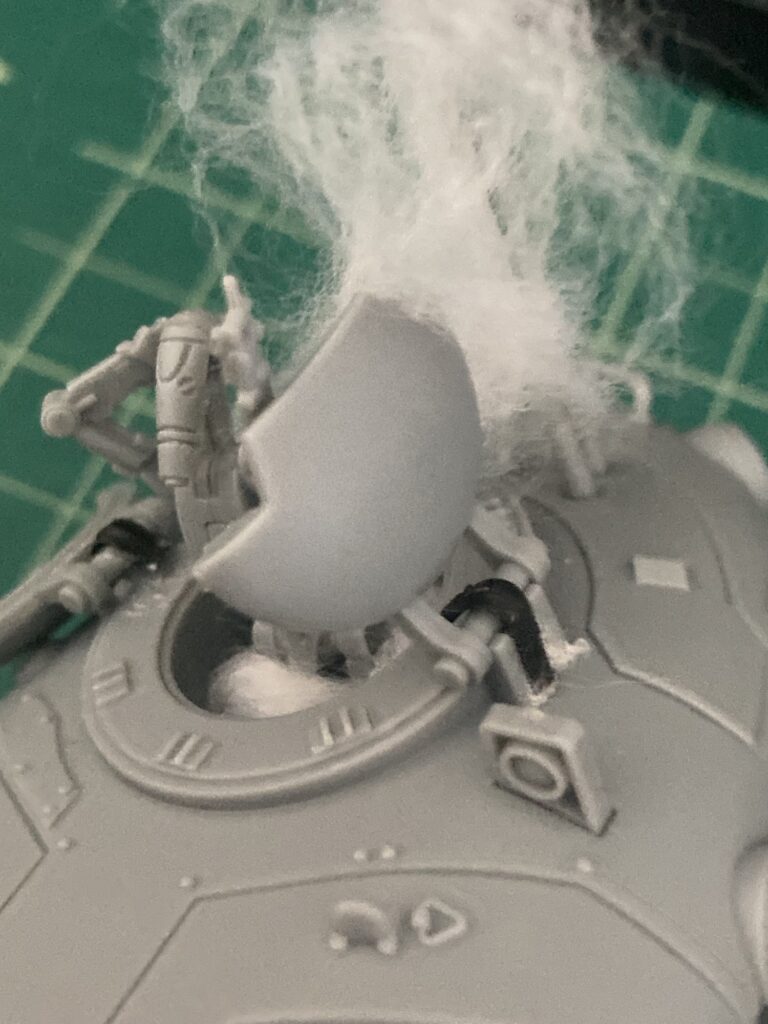
Justus: While assembling I decided to alter the 3 stages of damage signifiers to match the amount of smoke plumes to make it more visually understandable how damaged the AAT is.
Were there any unexpected or frustrating challenges and how have you overcome them?
Dallas: Not particularly. Making sure the story was told the way I would like took consideration, as well as the placement and amount of damage I planned to exhibit on the LAAT, but all it fell into place.
Anne: When I decided to make sure you could see a bit of the interior when the piece was finished, I became determined to put a puncture in the top of the truck. That seemed simple enough until I realized how many layers there were on the inside of the truck. I knew I would have to use my heat gun in sub assembly and carefully work through the layers from both sides so I didn’t completely melt the outside layer in an effort to get through both.
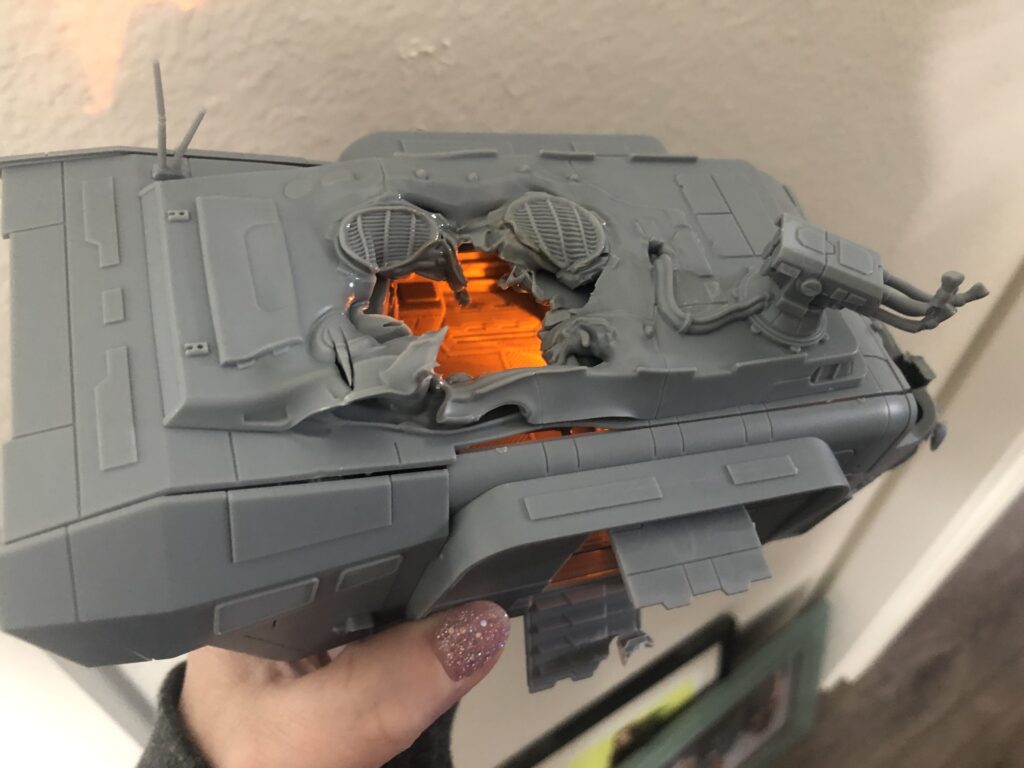
Kevin: I haven’t really run into anything I didn’t expect, but I did need to fully assemble the hover platform before adding damage so that I could ensure my dremel work would be consistent between the top and bottom halves. That had the knock on effect of making it a bit of a pain to insert the “innards” into the battle damaged platform. I made it as painless as possible by preplanning the composition of the gribble and leaving marks in the bottom half of the hover platform so that I could get the parts in place after assembly without also trying to consider how they were supposed to look.
Justus: The eternal challenge of working with miniatures is big hands, little pieces. Gluing the tiny hinges and making sure that they remained connected to the model proved difficult. The challenge was overcome with a copious amount of glue and patience.
How did you think about arranging everything on your base and did you have to make special accommodations?
Dallas: I slid the LAAT slightly off center of the base to allow the weight to shift to one side and allow the side with the open door more space for story telling as it is the focal point. Plus, the added GNK droid needed to really be in focus.

Anne: The tree ended up a lot larger than I originally imaged because I needed it to be big enough to take out this truck and not be completely mowed over. I definitely had to balance that decision against how much of the base it would take up to not cause problems during play. Because of that, I decided the trunk would need to have a more winding form, which went really well with my cherry blossom motif. So – happy accident!
Kevin: As we all know, the TX-130 Saber Tank is a hover vehicle. With the narrative in mind that my tank had only suffered a mobility kill, it was important that the base allowed me to convey that the functional hover platform was still up in the air. To facilitate this I created a series of rock outcroppings on my base which the saber appears to have wrecked into after being hit. This gave me the parts I needed to create the illusion that the tank was dead in the water, but the right hover platform was still working. These rocks also became the keys I used to lock the tank in place on the scenic terrain.
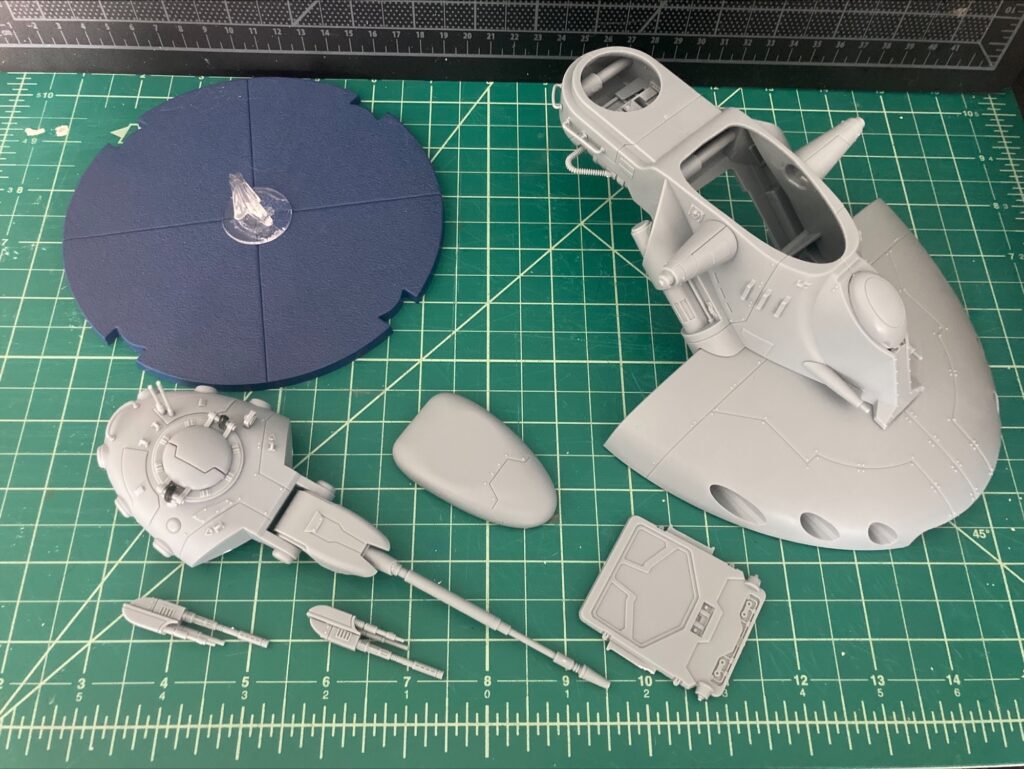
Justus: The base had to remain as the default to allow the model to be played as a unit. A special accommodation was made to let the model “topple” by leaving the back hatch unglued so it could be removed. That allows the model to fall back over the clear plastic that it’s normally mounted on.
Were there any additions you “hobbied” from scratch? New base? New terrain/environment elements?

Dallas: The base was cut from plastic card. I used some spare X-Wing bits here and there for ground scatter, and the rocks are a mix of pine bark and sculpted.
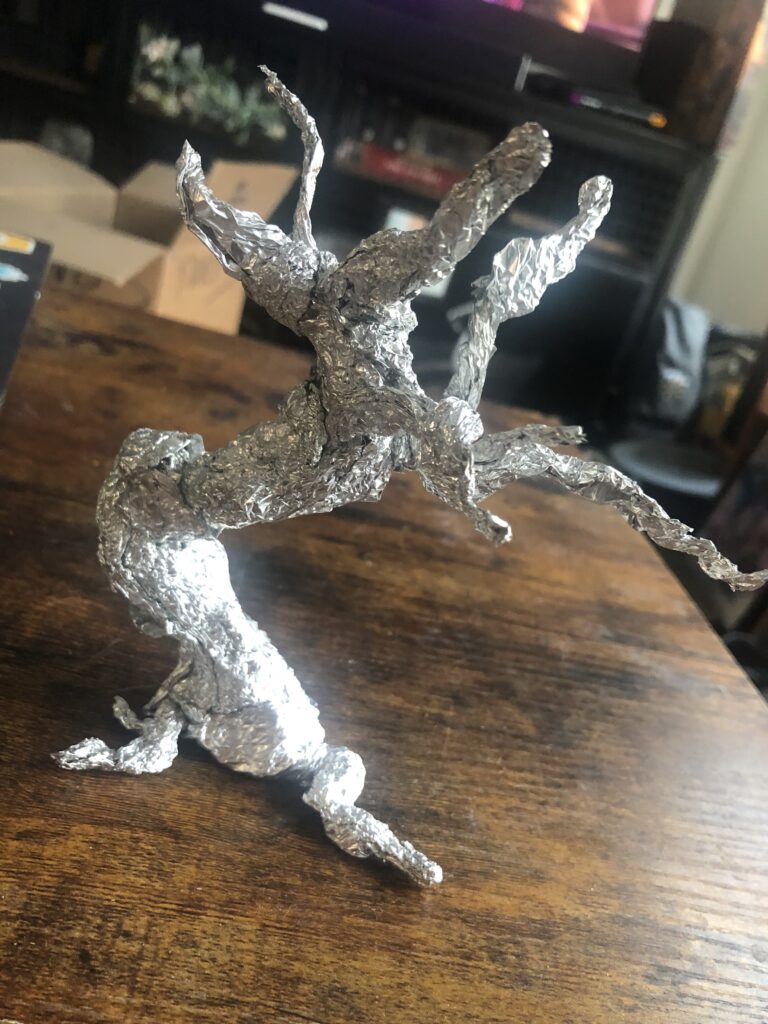
Anne: I sculpted the tree out of green stuff from scratch. I started by creating a base form with aluminum foil and then began working the green stuff into flat pieces that could be wrapped around the foil and sculpted bark texture on top. I’m still not totally satisfied that the tree has enough branches to put together the but puffs of pink petals I imagined, so I’m still sort of mulling that over.
Kevin: The entire base was built from foam core presentation board (the school project stuff), and insulation foam. The ground texture I created from a mixture of gesso (a canvas primer for those who don’t know), and playground sand. Highly recommend that mixture for texturing ground on medium to large sized terrain projects as since the gesso is already a primer you can just start painting on it once its dry. Additionally I used plasti-card and paper clips in addition to unused weapons from the saber tank frame to fill out the innards of the hover platform.
Justus: The biggest element that plays in with the 3 stages of destruction is the hinges I placed on the top and center hatch. (I had to carve the center hatch out with a Dremell) The hinges were made by using small bits of twist ties. Additional materials added was craft fluff to mimic smoke. I also glued a plastic tab from the model’s sprue under the top turret to make it a bit more stable while rotating.
Do you intend to paint everything assembled or in pieces and assemble afterwards?
Anne: I’ll definitely be painting in sub assembly, but I am also doing my best to make sure I pay attention to the light sources because of the fire inside the cab and the light coming in through the various doors and holes. I’ll finish the inner compartment and then assemble so that I can paint the entire outside at one.
Kevin: I will paint the tank in 3 major sub assemblies, the hull and the 2 hover platforms, and all of that will be separate from the terrain of course.
Justus: Most of the model is assembled, I left the top turret, roof of the model, side turrets, and bottom hatch unglued to allow them to come off and pose.
Dallas: I will need to leave the cockpit off to allow painting of the interior, but other than that, It’s all together! After I name the GNK, of course…

If you want to learn more about how this project got started, check out our transmission on Part 1 of the Star Wars: Legion Crashed Vehicle Project. Check back soon for the grand finale where we show our finished crashed vehicles for Star Wars: Legion Spec Ops!